

How To Repair Front Engine Seal
The purpose of a crankshaft seal is to deflect oil back into the oil sump, or oil pan, to both maintain the proper oil level and prevent leaking onto the ground. Your engine has two crank seals; one seal is located at the front end of the engine, backside the crankshaft harmonic balancer, and one is located at the back of the engine, backside the flywheel.
This article volition focus on how to replace the front crankshaft seal. Although the steps provided below are similar for most engines, in that location are many different engine designs, so please refer to your manufacturing plant service manual for detailed instructions on your particular vehicle.
Part 1 of ane: Replacing the front crankshaft seal
Materials Needed
- Breaker bar (one/two" drive)
- Combination wrench set
- Dead blow hammer
- Floor Jack
- Gear puller specific to the design of your harmonic balancer
- Jack stands
- New front end crankshaft seal
- Screwdriver set
- Seal removal and installation kit
- Socket set (1/two" bulldoze)
- Strap wrench
- Torque wrench (1/2" bulldoze)
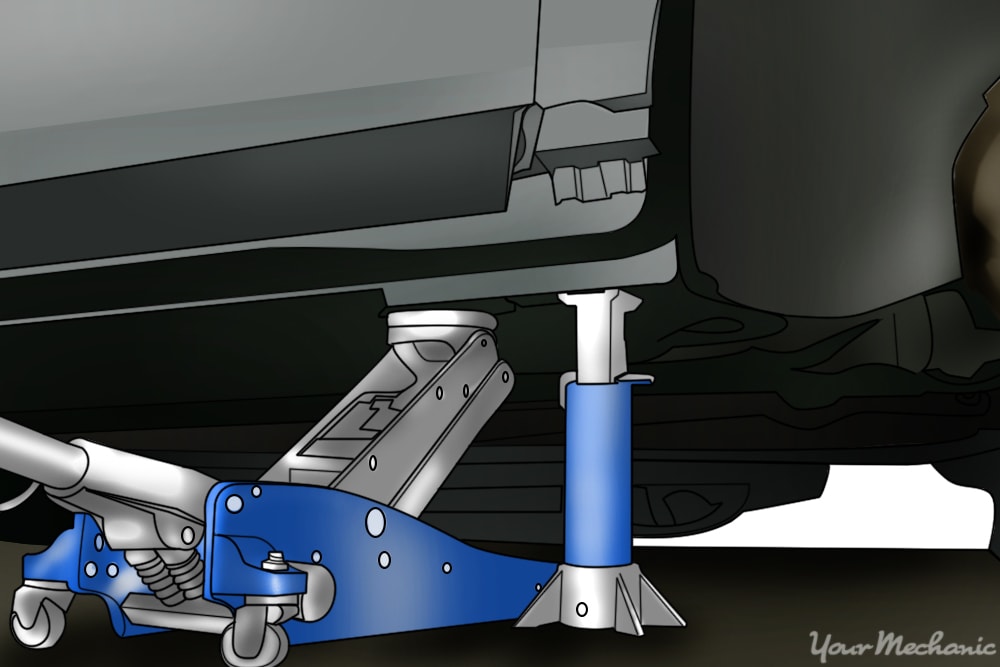
Step one: Fix the vehicle. Jack the vehicle up high enough to obtain access to the harmonic balancer, which is located on the front end of the motor and attached to the crankshaft. Secure it on jack stands.
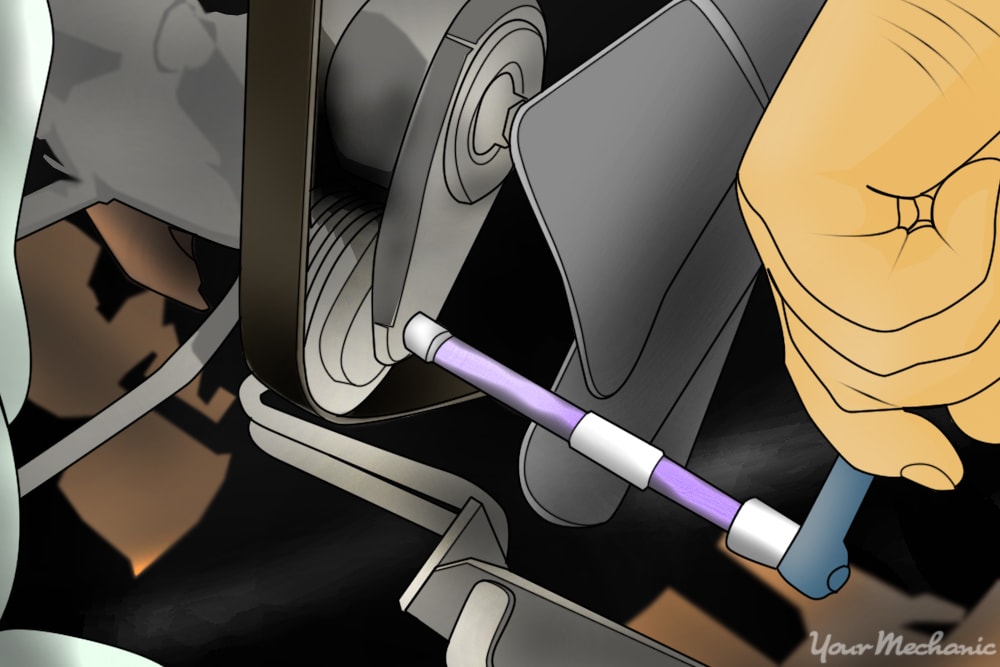
Step 2: Remove the accessory drive belts. On many mod vehicles, at that place is an automatic, spring-loaded belt tensioner that can be rotated to loosen the belts.
Yous may need to use an open end wrench or ratchet handle depending on the blueprint. Older vehicles, and even some newer ones, require you to loosen a mechanical tensioner.
- Tip: Have a moving-picture show of the belt routing for future reference.

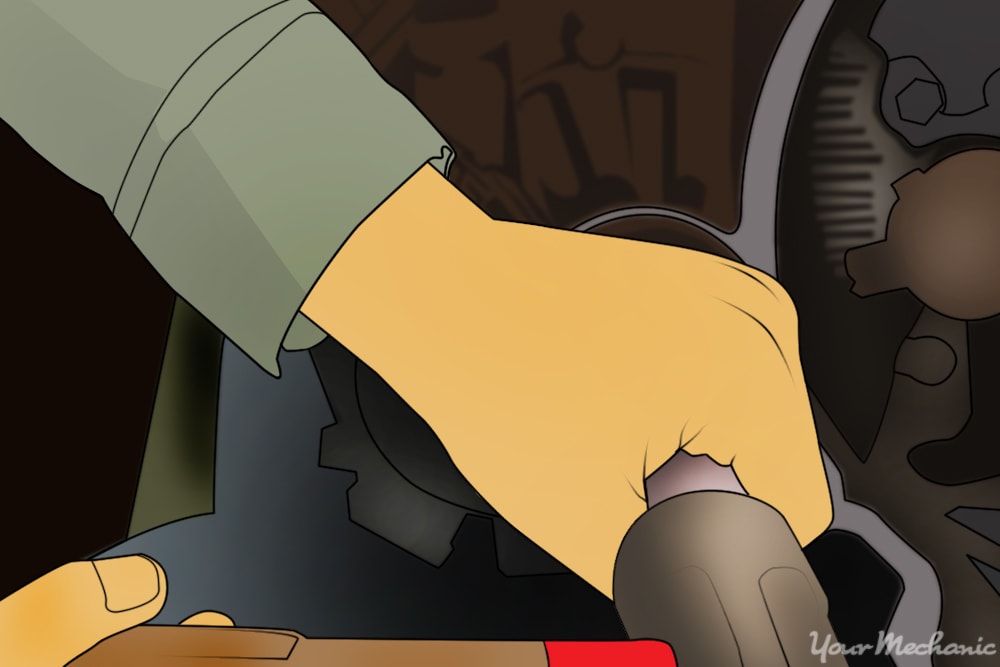
Step 3: Remove the harmonic balancer bolt. Remove the harmonic balancer bolt by using the strap wrench to hold the balancer still while loosening the bolt with a socket and ratchet handle or breaker bar. It will be very tight, then pull hard.
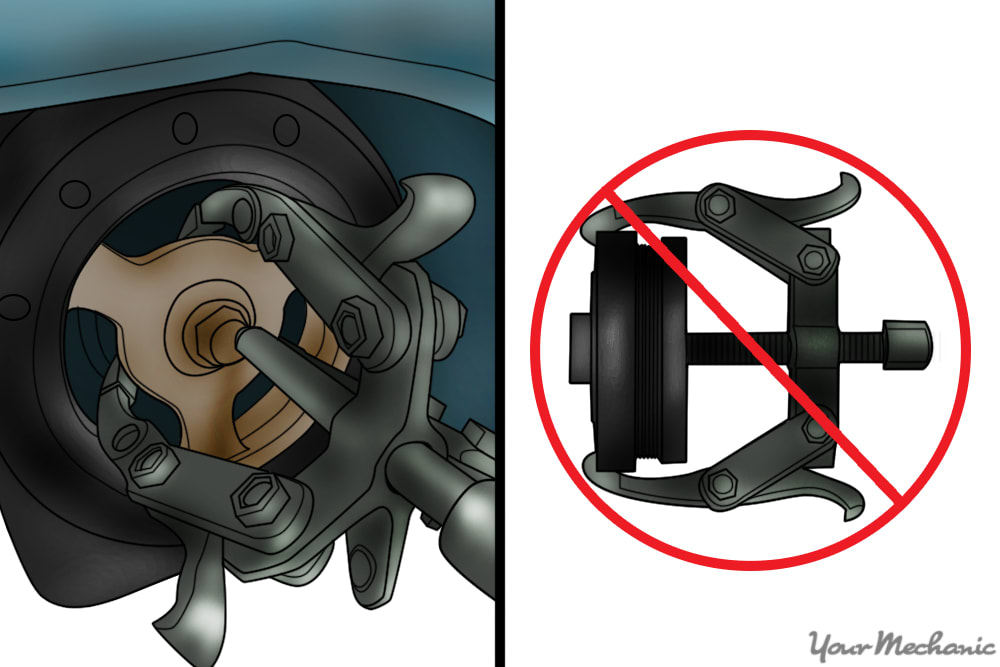
Step 4: Remove the harmonic balancer unit. Employ the gear puller to remove the harmonic balancer unit. Place the hooks in an surface area that volition not easily pause, like the lip of the pulley section.
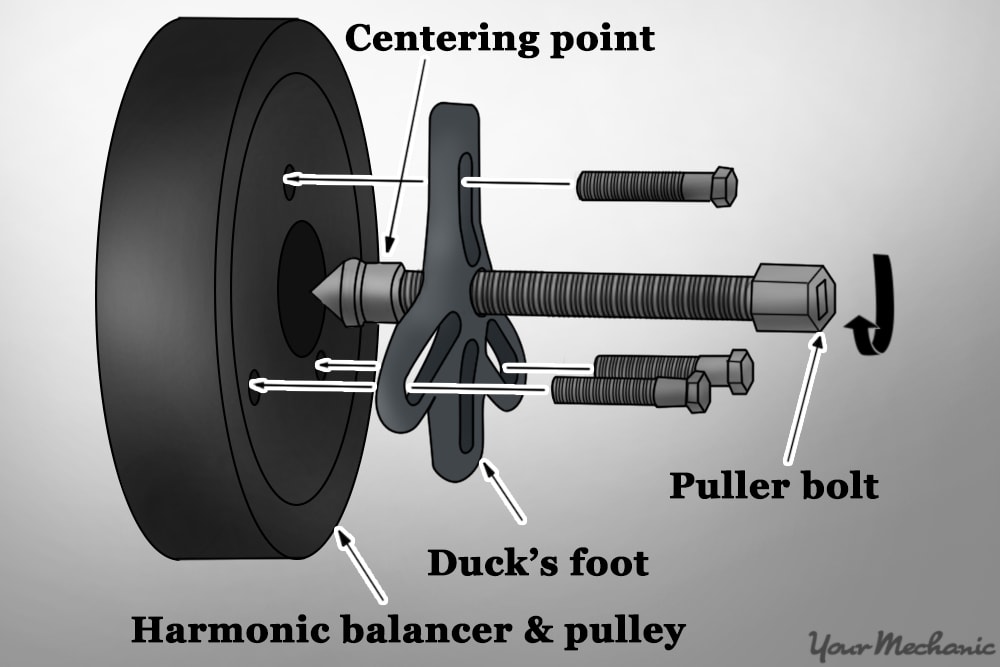
Some vehicles accept threaded bolt holes in the balancer that can be used to attach a puller. Tighten the centre bolt with a ratchet handle or breaker bar until the balancer breaks costless.

- Tip: Most harmonic balancers are kept from rotating on the crankshaft by using a woodruff key. Don't lose the woodruff cardinal, equally you will need it for reassembly.
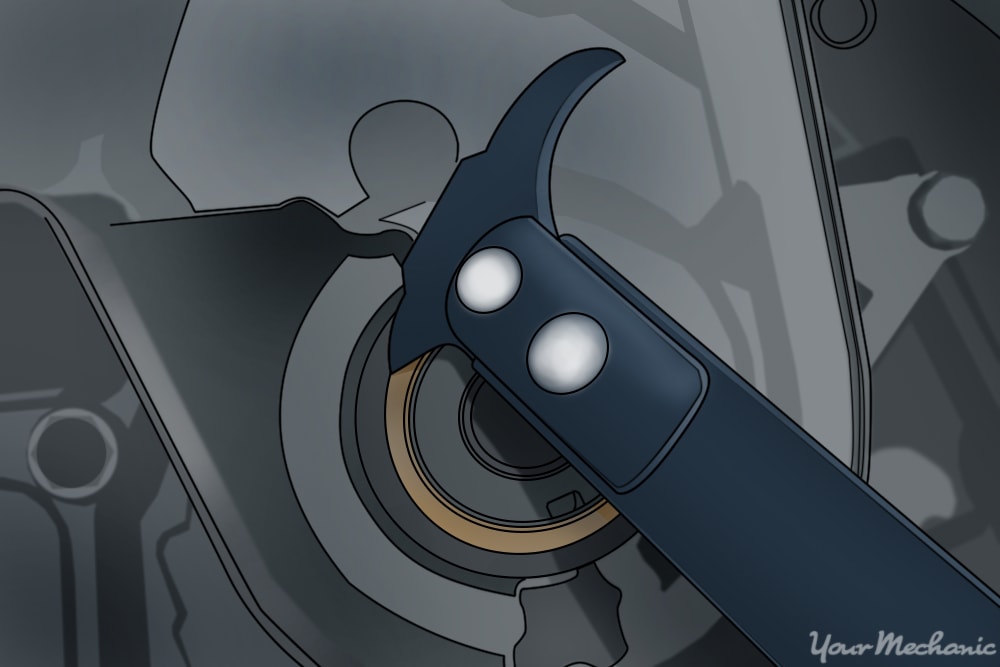
Step 5: Remove the onetime crankshaft seal. Using a seal puller, gently pry the old seal loose from the crankcase.
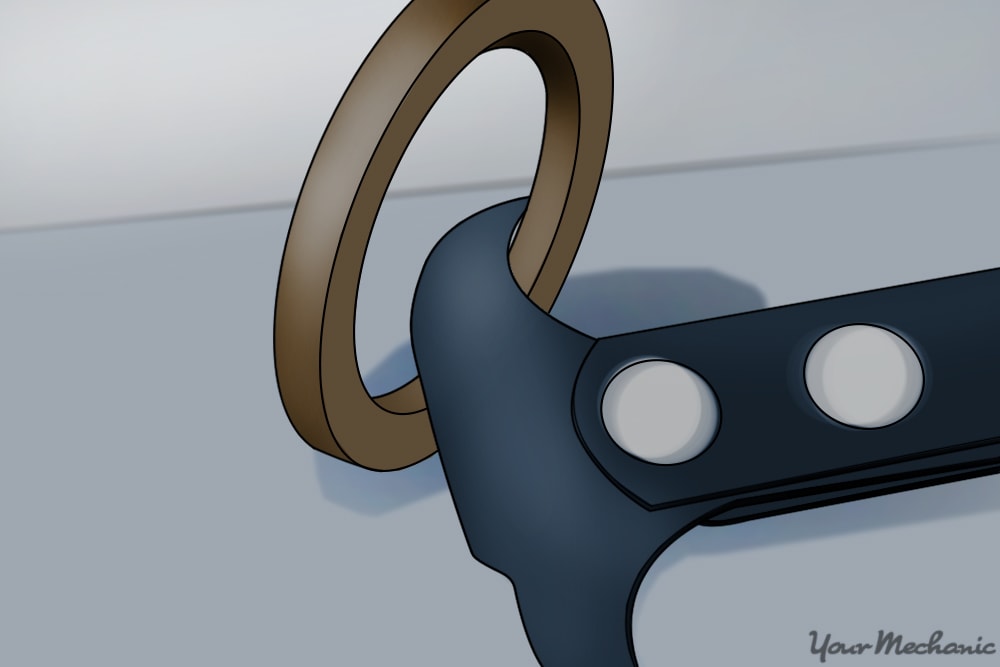
The objective is to try and claw onto the seal, between the seal and the crankshaft, and pry it loose. It may take several attempts at unlike positions to fully release the seal.
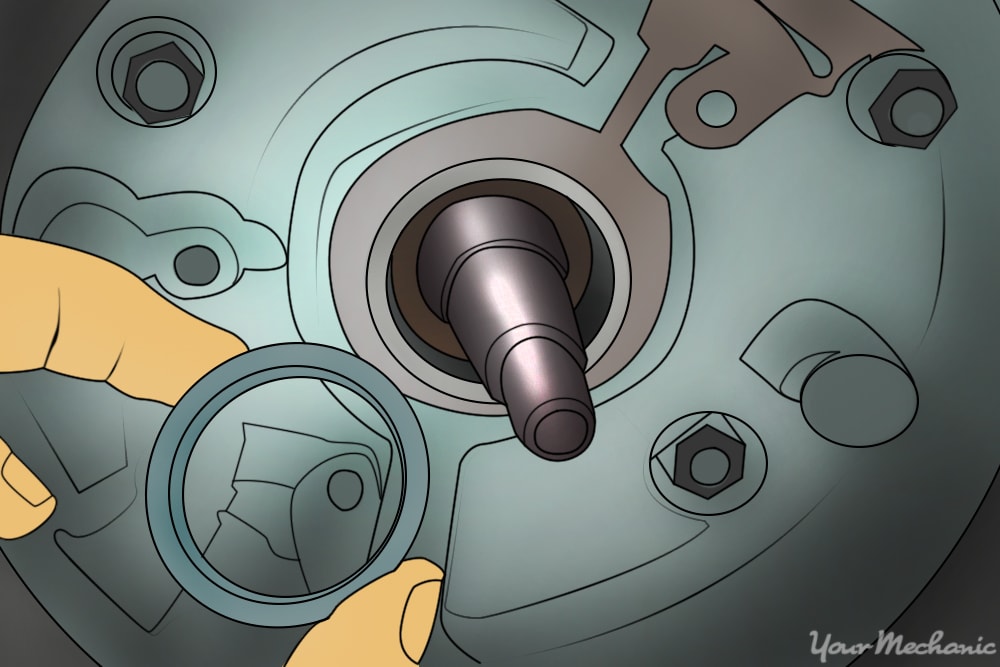
Step 6: Install the new crankshaft seal. Lubricate the new seal with fresh motor oil to preclude violent of the seal and to make installation easier. And so, position the seal with the lip towards the engine block and press it on past hand.
Place the seal over the crankshaft with a seal commuter tool and use a expressionless blow hammer to gently tap the seal into place.
- Note: You can also utilise a large deep well socket or a pipe coupler as a seal driver if it has the same outside diameter as the seal itself.

Be sure that the new crankshaft seal looks properly installed.
Step 7: Install the new harmonic balancer. Marshal the woodruff cardinal slot in the new balancer with the woodruff central and carefully slide the balancer onto the crankshaft, making sure the keyway remains in its proper position.
Install the centre bolt and tighten until the required torque specification is obtained.
Footstep 8: Reinstall the belts. Rotate or loosen the chugalug tensioner to reinstall any accompaniment belts that were removed.
- Note: Refer to any pictures you took or your manufacturing plant service manual to make up one's mind the correct belt routing.
Step nine: Lower the vehicle. After supporting the vehicle with the floor jack, carefully remove the jack stands and lower the vehicle. Start the vehicle to ensure proper reassembly and operation.
Replacing a crankshaft seal is doable if you lot follow the correct steps. However, if you are not comfortable performing such a task yourself, a certified technician, like ane from YourMechanic, will have the tools and skills required to complete the front crankshaft seal replacement for y'all.
The statements expressed to a higher place are simply for advisory purposes and should be independently verified. Please see our terms of service for more details

Source: https://www.yourmechanic.com/article/how-to-replace-a-crankshaft-seal-by-richard-zeppetini
Posted by: janssonsoublartand1963.blogspot.com
0 Response to "How To Repair Front Engine Seal"
Post a Comment